A Mac with macOS 14 or later, and Xcode with at least one iOS Simulator runtime. SimBuddy works with the standalone Simulator and with Xcode 27’s Device Hub.
Stuck? Let’s fix it.
SimBuddy support. Search the fixes for setup, permissions, network tools, agents and your subscription, or write to us and a person will answer.
SimBuddy lives in three places: the 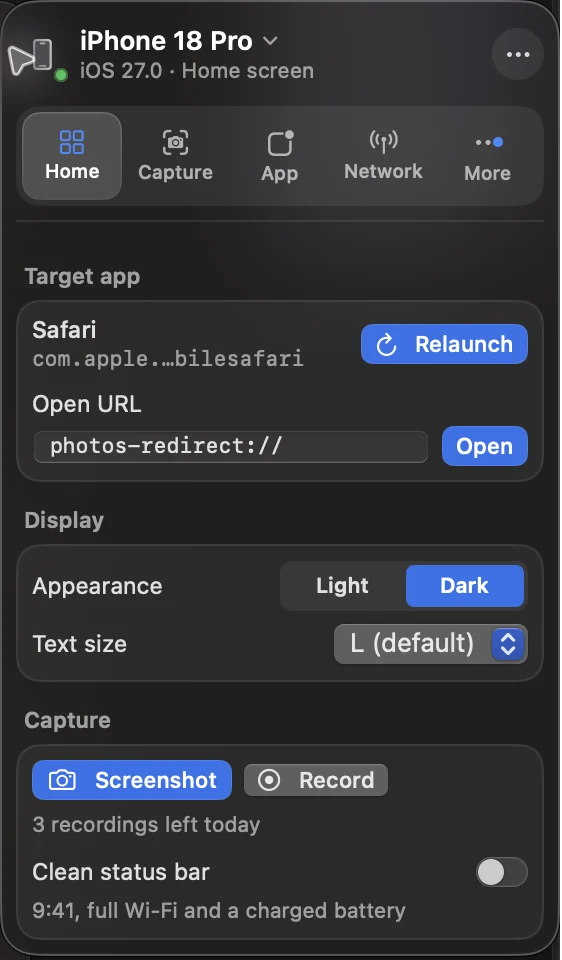 panel by your Simulator, the
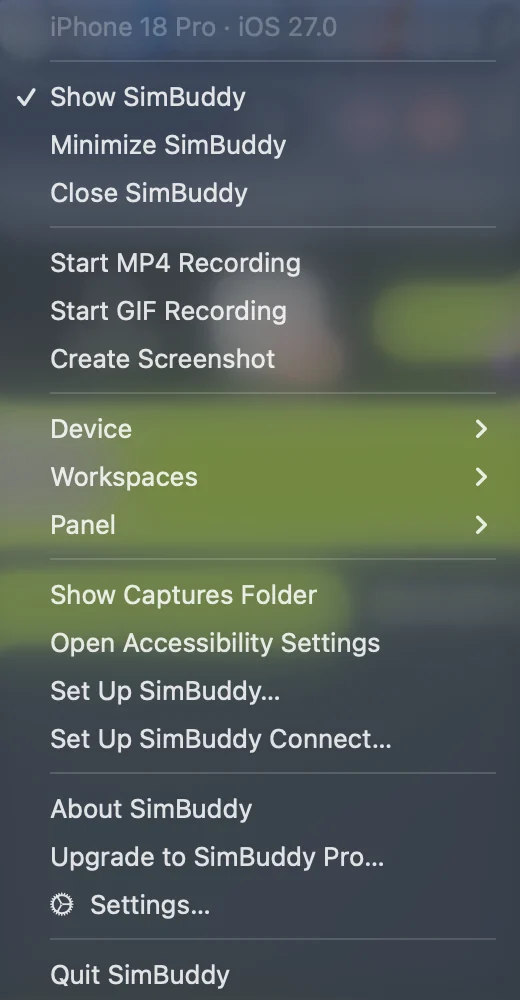 menu bar and
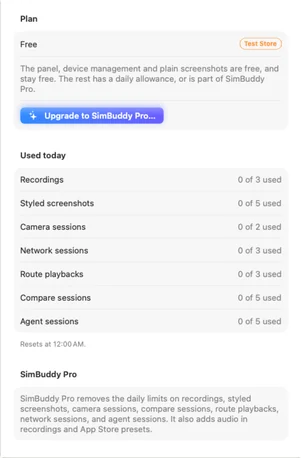 Settings. Every fix starts in one of them.
Find the fix
Type what’s going wrong, or pick an area. Each fix lists its steps in order.
-
- Boot a device in Simulator, or in Device Hub on Xcode 27.
- Click SimBuddy in the menu bar and choose Show SimBuddy.
- If the panel says No Simulator devices found, start or select a Simulator, then click Refresh devices. SimBuddy lists the devices of the Xcode you’re using.
-
- Open System Settings › Privacy & Security › Accessibility.
- Turn on SimBuddy. It notices the change by itself; no restart needed.
- Try again. Accessibility powers touch marks in recordings and SimBuddy’s global shortcuts.
-
- Open System Settings › Privacy & Security › Screen Recording and turn on SimBuddy.
- If macOS asks, quit and reopen SimBuddy. Capture may not work until you do.
- The first time SimBuddy records, and now and then after that, macOS asks you to confirm screen capture. Choose Allow.
-
- Open System Settings › General › Login Items & Extensions.
- Under Network Extensions, in the By Category list, turn on SimBuddy. The By App switch doesn’t control it.
- When macOS asks to add proxy configurations, choose Allow. It asks once more if you ever switch the extension off and on.
-
- In the Network workspace, choose Open Network Monitor, then Relaunch with Monitor. For a Run from Xcode linked through SimBuddy Runtime, choose Capture This Run instead: nothing relaunches and the debugger stays attached.
- Use the app. Its URLSession requests and log lines appear as they happen.
- Requests your app makes without URLSession aren’t captured.
-
- Open SimBuddy’s Settings › Agents and connect your agent: Codex, Claude Code, Claude Desktop or Cursor.
- Restart the agent, or start a new session, so it picks up SimBuddy’s tools.
- Run
simbuddy doctorin Terminal. It checks the bridge, the handoffs folder, Xcode and the Simulator, and says what to fix.
-
- In SimBuddy’s menu bar menu, choose Setup › Set Up SimBuddy Runtime….
- Click Add to Xcode. It adds a short block to Xcode’s LLDB settings; Copy Command gives you the same change to run in Terminal instead.
- Stop your app and run it again from Xcode, then start the feed in the Camera workspace.
-
- Open Settings › SimBuddy Pro and click Restore Purchases.
- Check that the App Store on this Mac uses the Apple ID you bought with.
- If SimBuddy says your subscription was found but isn’t active yet, wait a moment and try again.
-
- Open Settings › SimBuddy Pro to see what you used today. The counts reset at midnight.
- The panel, device management and plain screenshots are free and never count.
- SimBuddy Pro removes the daily limits.
-
- In SimBuddy, open Settings › SimBuddy Pro and click Manage Subscription….
- Or open the App Store, click your name, then Account Settings › Subscriptions.
- Cancel at least 24 hours before the current period ends to stop the next renewal.
-
- Open SimBuddy’s Settings › Privacy.
- Under Diagnostics, click Create Report… and save the file. It holds SimBuddy’s version, your Mac and macOS, the last five freezes and SimBuddy’s own log lines from the last hour, with home folders and tokens removed.
- Email the report to us with what you were doing when it happened. Freeze reports › Show in Finder opens every freeze SimBuddy kept.
-
- If you set up SimBuddy Runtime, open Setup › Set Up SimBuddy Runtime… in the menu bar menu and choose Remove.
- Run
simbuddy skill remove, and remove SimBuddy from your agents, for example withcodex mcp remove simbuddyorclaude mcp remove simbuddy. - Quit SimBuddy and move it to the Trash.
- Remove the network extension in System Settings › General › Login Items & Extensions.
- Delete
~/Library/Containers/dev.simbuddy.SimBuddyand the SimBuddy folder in~/Library/Group Containers. If you don’t want your captures, delete the SimBuddy folder in Documents or Downloads too.
No fix matches that yet. Write to us and we’ll help.
Getting started
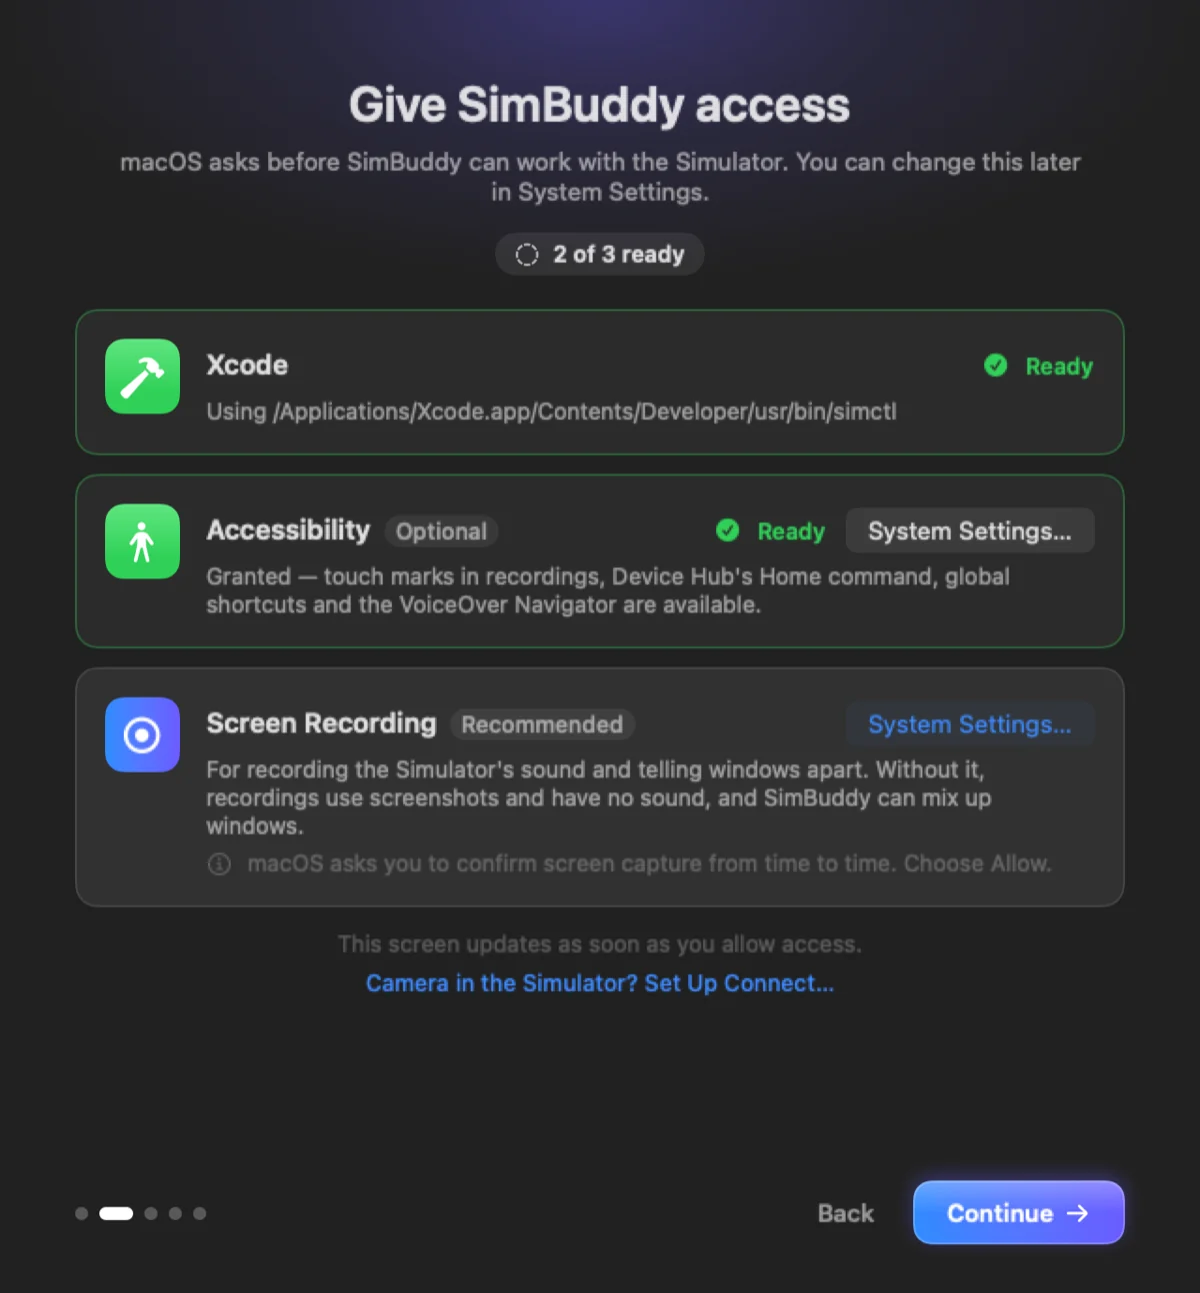
First, give SimBuddy access.
The setup window lists what macOS needs to allow. Xcode is required; Accessibility and Screen Recording turn on more, and SimBuddy notices each grant by itself.
Then open a Simulator.
SimBuddy docks to the Simulator window’s edge and follows the device on screen: its app, deep links, appearance, text size and captures.
Capture, compare and mirror.
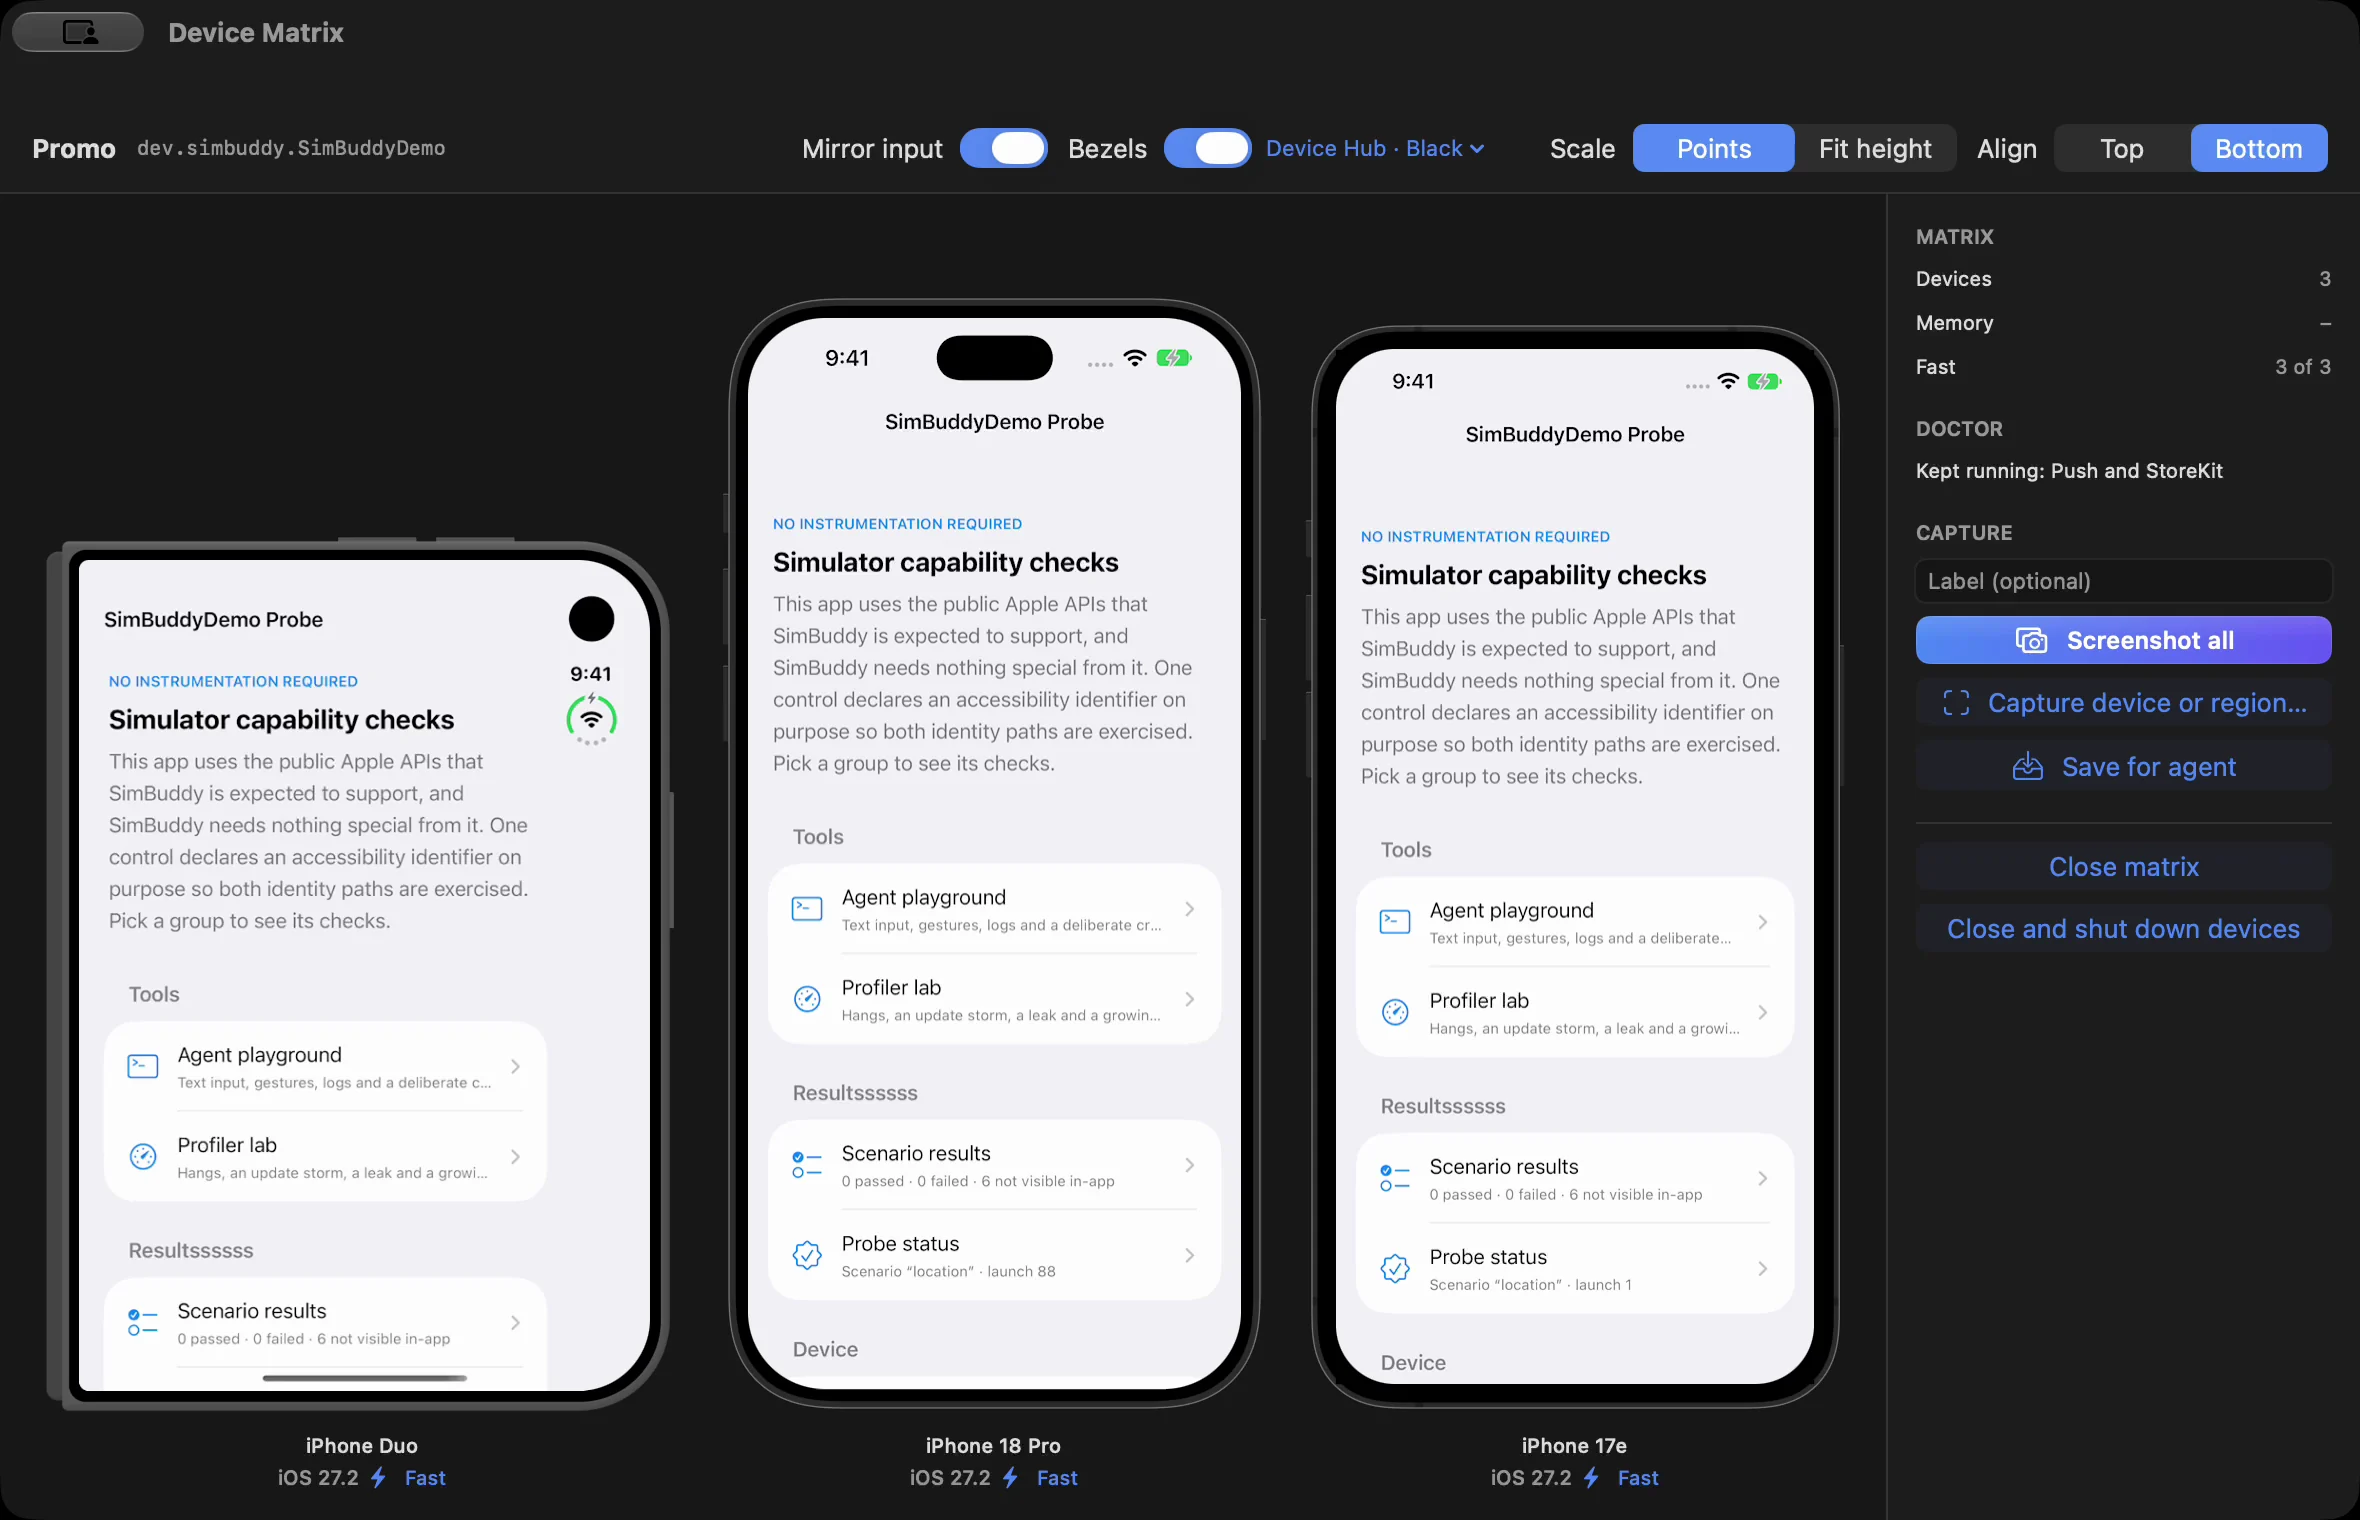
Screenshots, recordings and GIFs land in Documents › SimBuddy, or in Downloads › SimBuddy until you let SimBuddy into Documents. The Device Matrix runs several devices side by side and mirrors your input to all of them.
Last, bring in your agent.
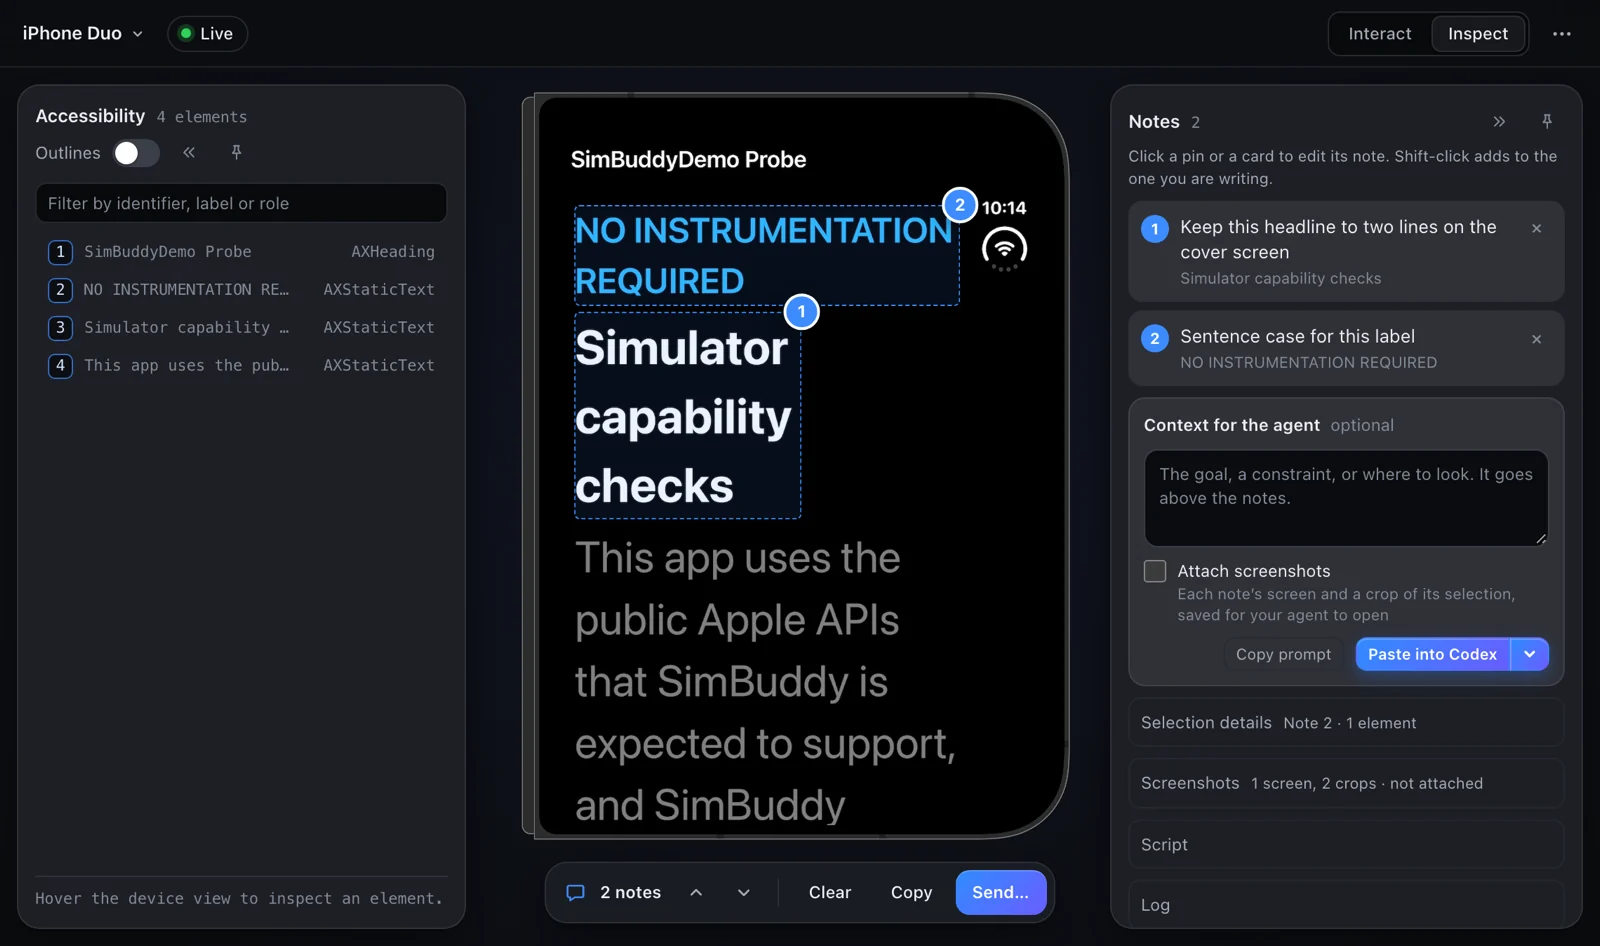
Connect Codex, Claude Code, Claude Desktop or Cursor in Settings › Agents. In SimBuddy’s web page, pin notes on the screen and send them to your agent.
Questions, answered
The short answers to what people ask most.

The panel, device management and plain screenshots are free and stay free. Recordings, styled screenshots, camera, network, route playback, compare, agent and Device Matrix sessions come with a daily allowance.
SimBuddy Pro removes those limits and adds audio in recordings and App Store presets.
No. SimBuddy has no sign-in. SimBuddy Pro belongs to your Apple ID, so Restore Purchases brings it to your other Macs.
In Settings › Agents, SimBuddy connects to Codex, Claude Code, Claude Desktop and Cursor.
Any agent that can run a command can also use the simbuddy command, which answers in JSON.
No. Your Simulator, captures, network history and agent sessions stay on your Mac. Besides an anonymous subscription check, SimBuddy sends crash reports and usage data only if you turn them on in Settings › Privacy, and neither includes your apps, files or devices. Read the privacy policy.
In Documents › SimBuddy, unless you choose another folder in Settings › Folders. Choose Show Captures Folder in SimBuddy’s menu bar menu to open it.
The button opens your mail app with this filled in; attach a diagnostics report there if you made one. Nothing is sent until you send it. Or write to support@simbuddy.dev.
Your mail app should be open now. If it isn’t, write to support@simbuddy.dev.